Create insfratructure using CDK
Create the CDK app
- Create new directory and move to that directory.
cd ..
mkdir cdk-pipeline-eb-demo
cd cdk-pipeline-eb-demo
If your NodeJS application is still running, press Ctrl + C to stop.
- Initialize the CDK application that we will use to create the infrastructure.
npx cdk init app --language typescript

- Initiate a local git repository.
git branch -m main
Move the Application into GitHub
- After the GitHub repository is created, we will push the local application files to it. Move the application source files into new folder src.
cp -r ../my_webapp ./src
echo '!src/*' >> .gitignore
echo 'src/package-lock.json' >> .gitignore
echo 'src/node_modules' >> .gitignore
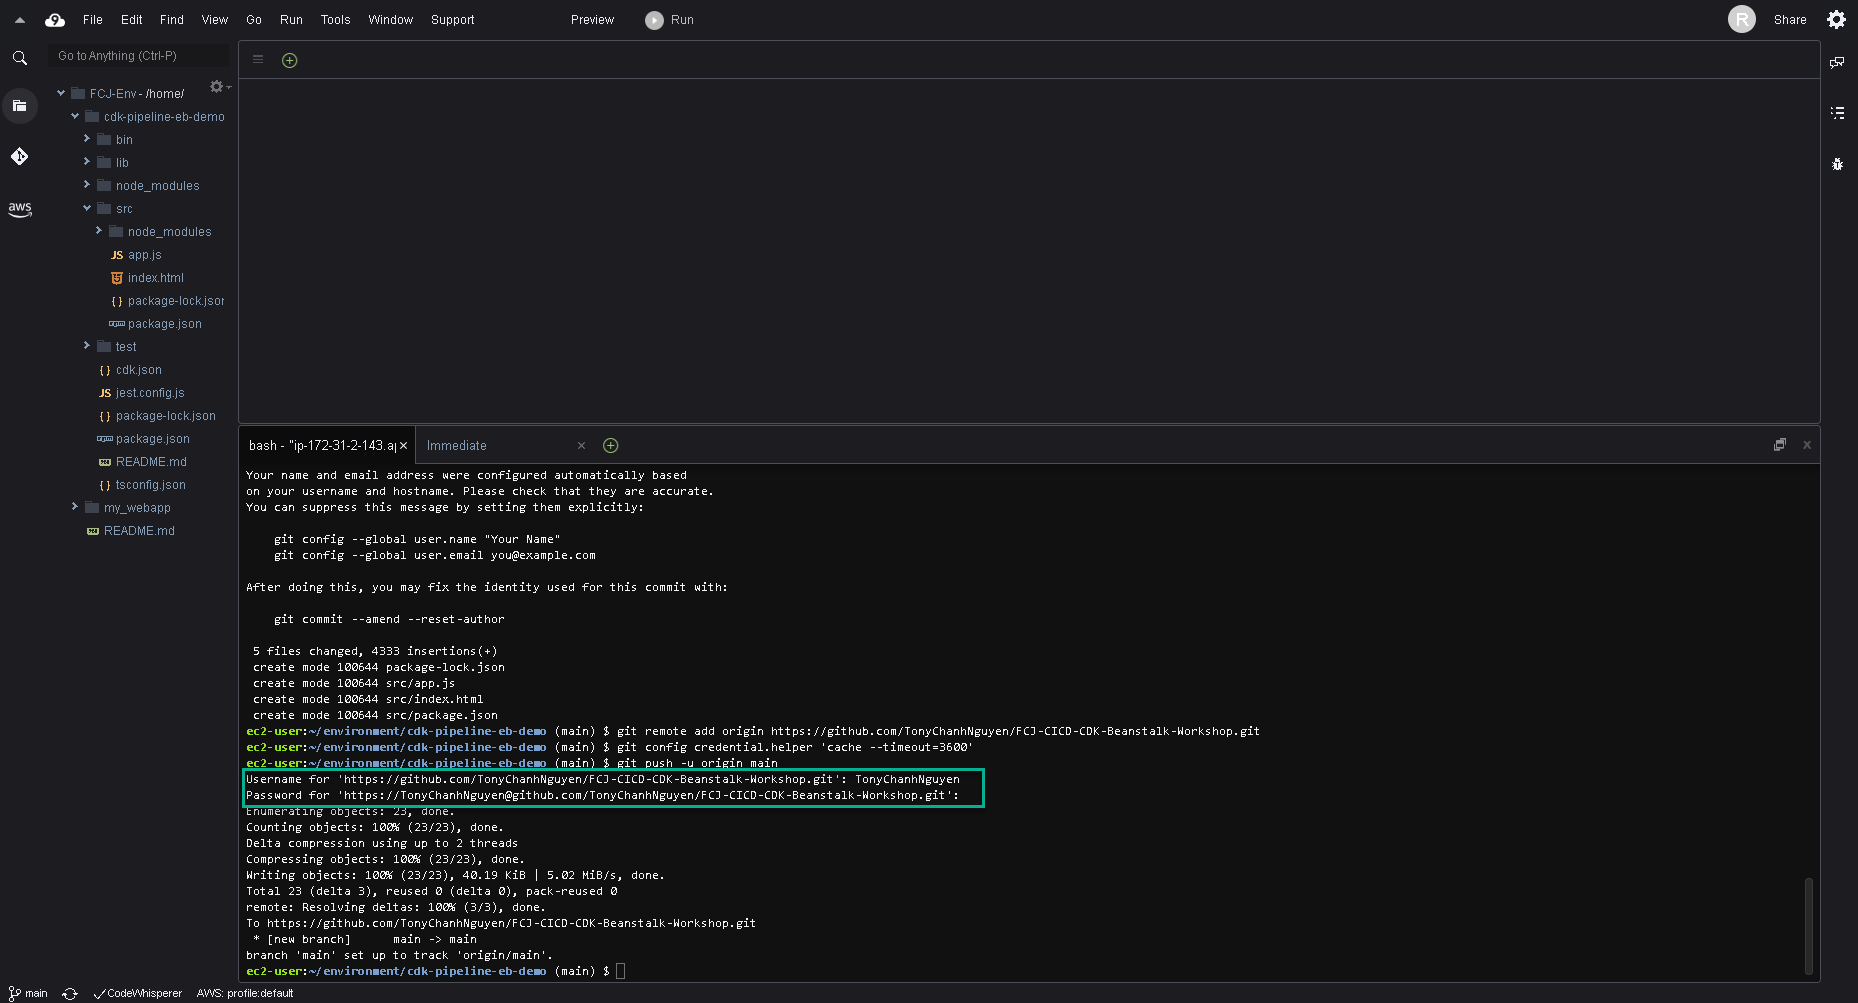
- Push all files to GitHub. Ensure to replace YOUR_USERNAME with your github org and YOUR_REPOSITORY with your repository name.
git add .
git commit -m "initial commit"
git remote add origin https://github.com/YOUR_USERNAME/YOUR_REPOSITORY.git
git config credential.helper 'cache --timeout=3600'
git push -u origin main
- You will be asked the Username and Password for the first time.
Password is the access token of your GitHub account had been generated at step 2.1- Create GitHub repository
Create the code for the resource stack
We are going to delete the default file created by CDK and define our own code for all the ElasticBeanstalk resources stack.
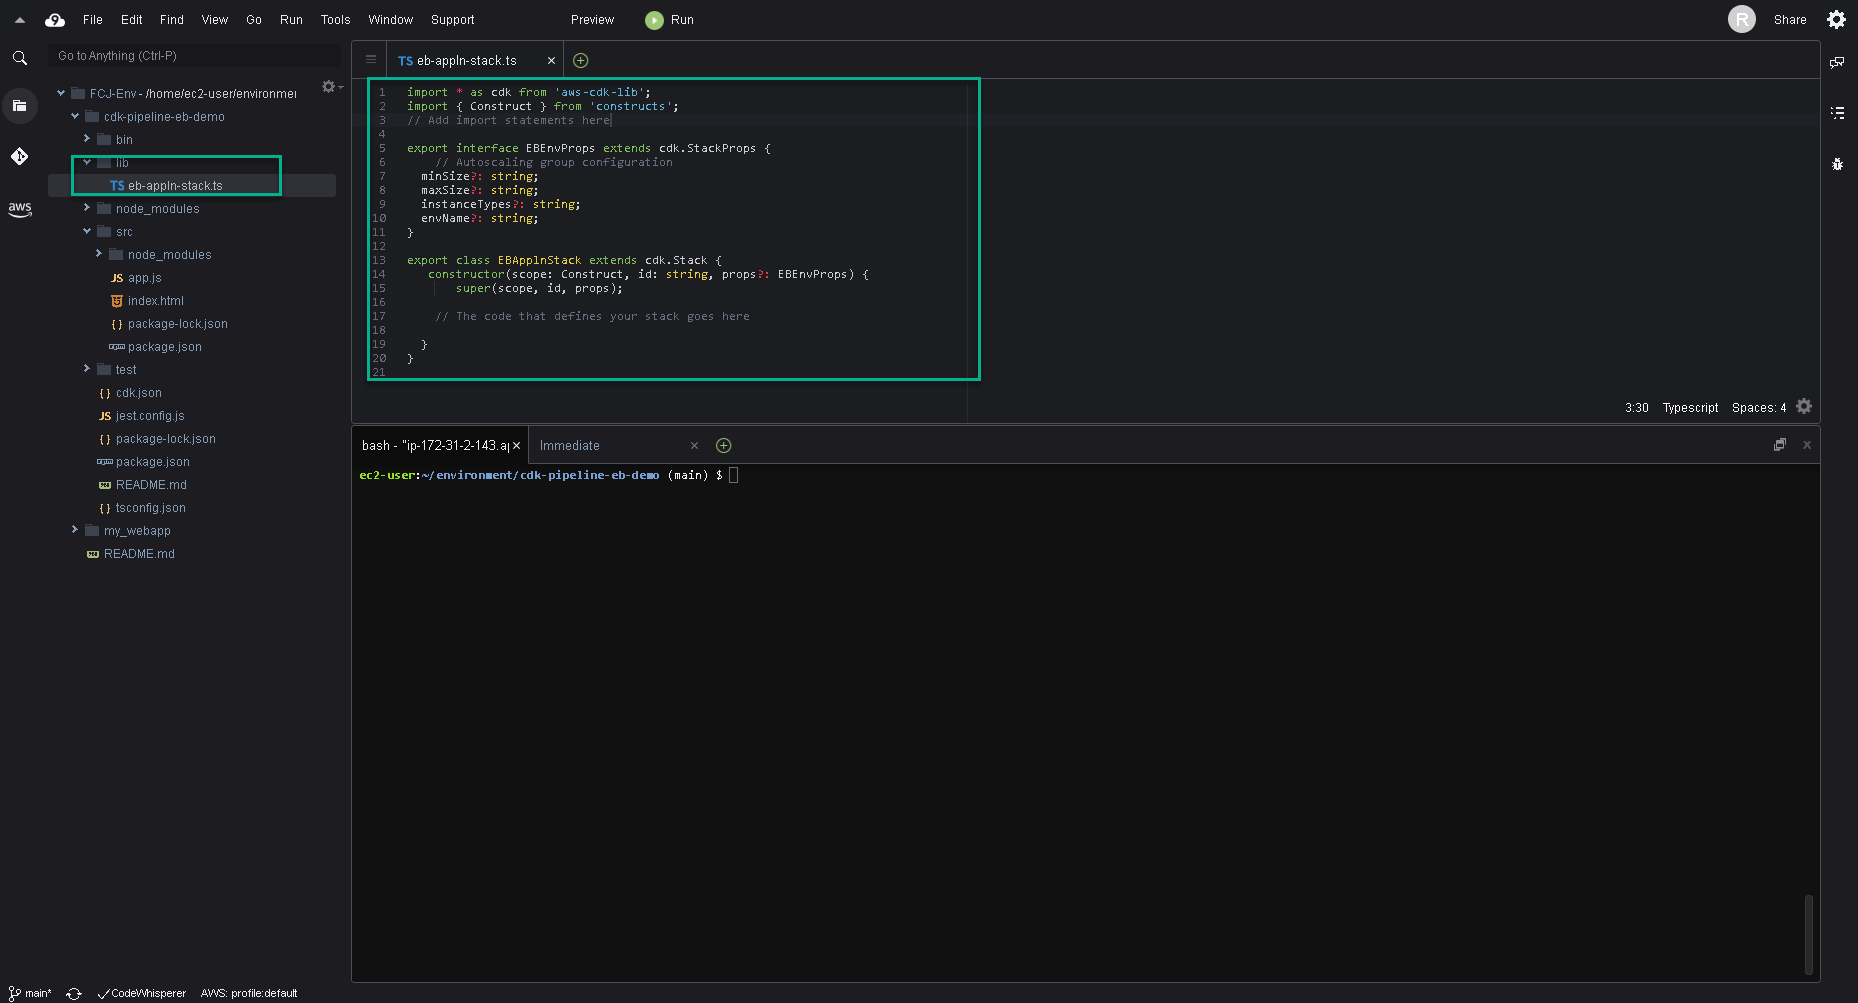
- At ./cdk-pipeline-eb-demo/lib, delete file cdk-pipeline-eb-demo.ts.
- Create new file name eb-appln-stack.ts.
- Paste the following code and save.
import * as cdk from 'aws-cdk-lib';
import { Construct } from 'constructs';
// Add import statements here

export interface EBEnvProps extends cdk.StackProps {
    // Autoscaling group configuration
minSize?: string;
maxSize?: string;
instanceTypes?: string;
envName?: string;
}

export class EBApplnStack extends cdk.Stack {
constructor(scope: Construct, id: string, props?: EBEnvProps) {
    super(scope, id, props);

    // The code that defines your stack goes here

}
}
A resource stack is a set of cloud infrastructure resources—all AWS resources in this case—that will be provisioned into a specific account. The account where these resources will be provisioned is the stack that you configured in the prerequisite. In this resource stack, we are going to create these resources:
- IAM Instance profile and role: A container for an AWS Identity and Access Management (IAM) role that we can use to pass role information to an Amazon EC2 instance when the instance starts.
- S3 Assets: This helps us to upload the zipped application into Amazon Simple Storage Service (S3) and will provide the CDK application a way to get the object location.
- Elastic Beanstalk App: A logical collection of Elastic Beanstalk components, including environments, versions, and environment configurations.
- Elastic Beanstalk App Version: A specific, labeled iteration of deployable code for a web application. An application version points to an Amazon S3 object that contains the deployable code, in this case, the zip file that we will be uploading to S3 using S3 Assets. Applications can have many versions and each application version is unique.
- Elastic Beanstalk Environment: A collection of AWS resources running an application version. Each environment runs only one application version at a time.
Upload the App to S3 Automatically
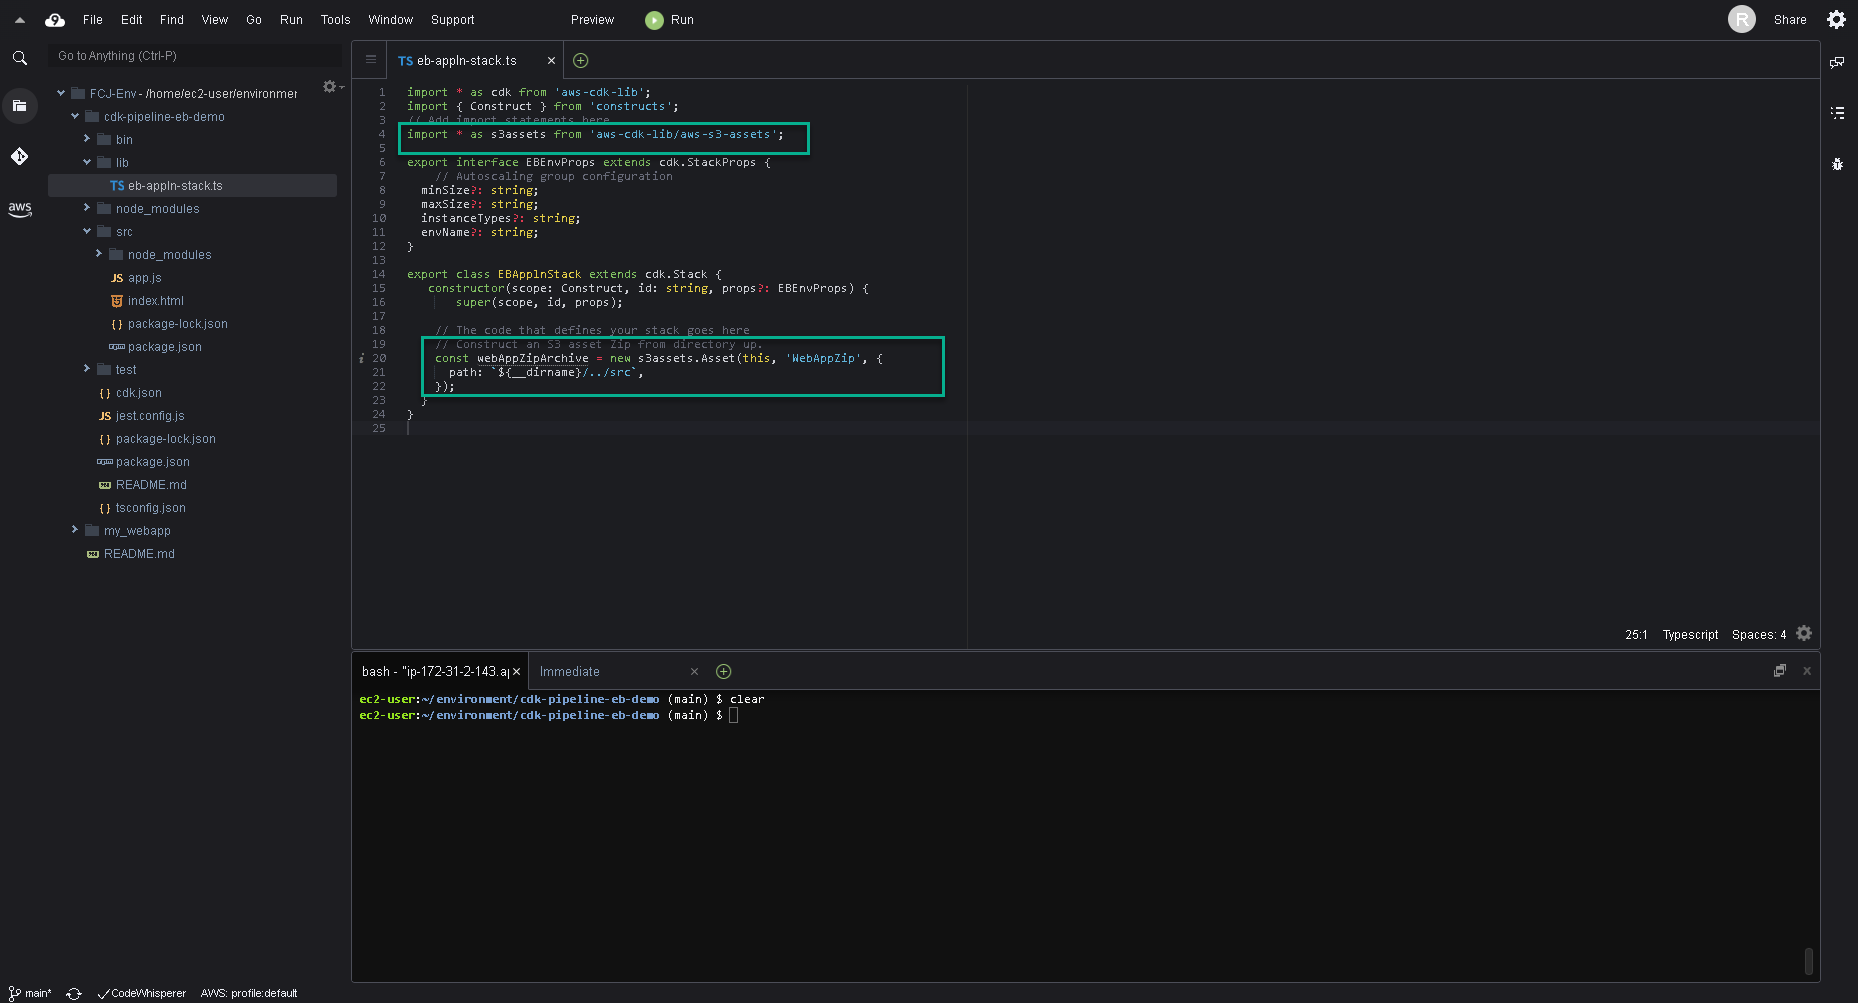
- In the lib/eb-appln-stack.ts file, add the dependency to the top of the file.
import * as s3assets from 'aws-cdk-lib/aws-s3-assets';
- Under the commented line that says The code that defines your stack goes here add the following code:
// Construct an S3 asset Zip from directory up.
const webAppZipArchive = new s3assets.Asset(this, 'WebAppZip', {
  path: `${__dirname}/../src`,
});