Create CICD Pipeline Stack
Defining an Empty Pipeline
For this step, we are only creating these predefined stages - Source, Build and UpdatePipelineand hence it is an empty pipeline. In the next section, we will add stages (PublishAssets, Stage1) and actions to it to suit the needs of our application.
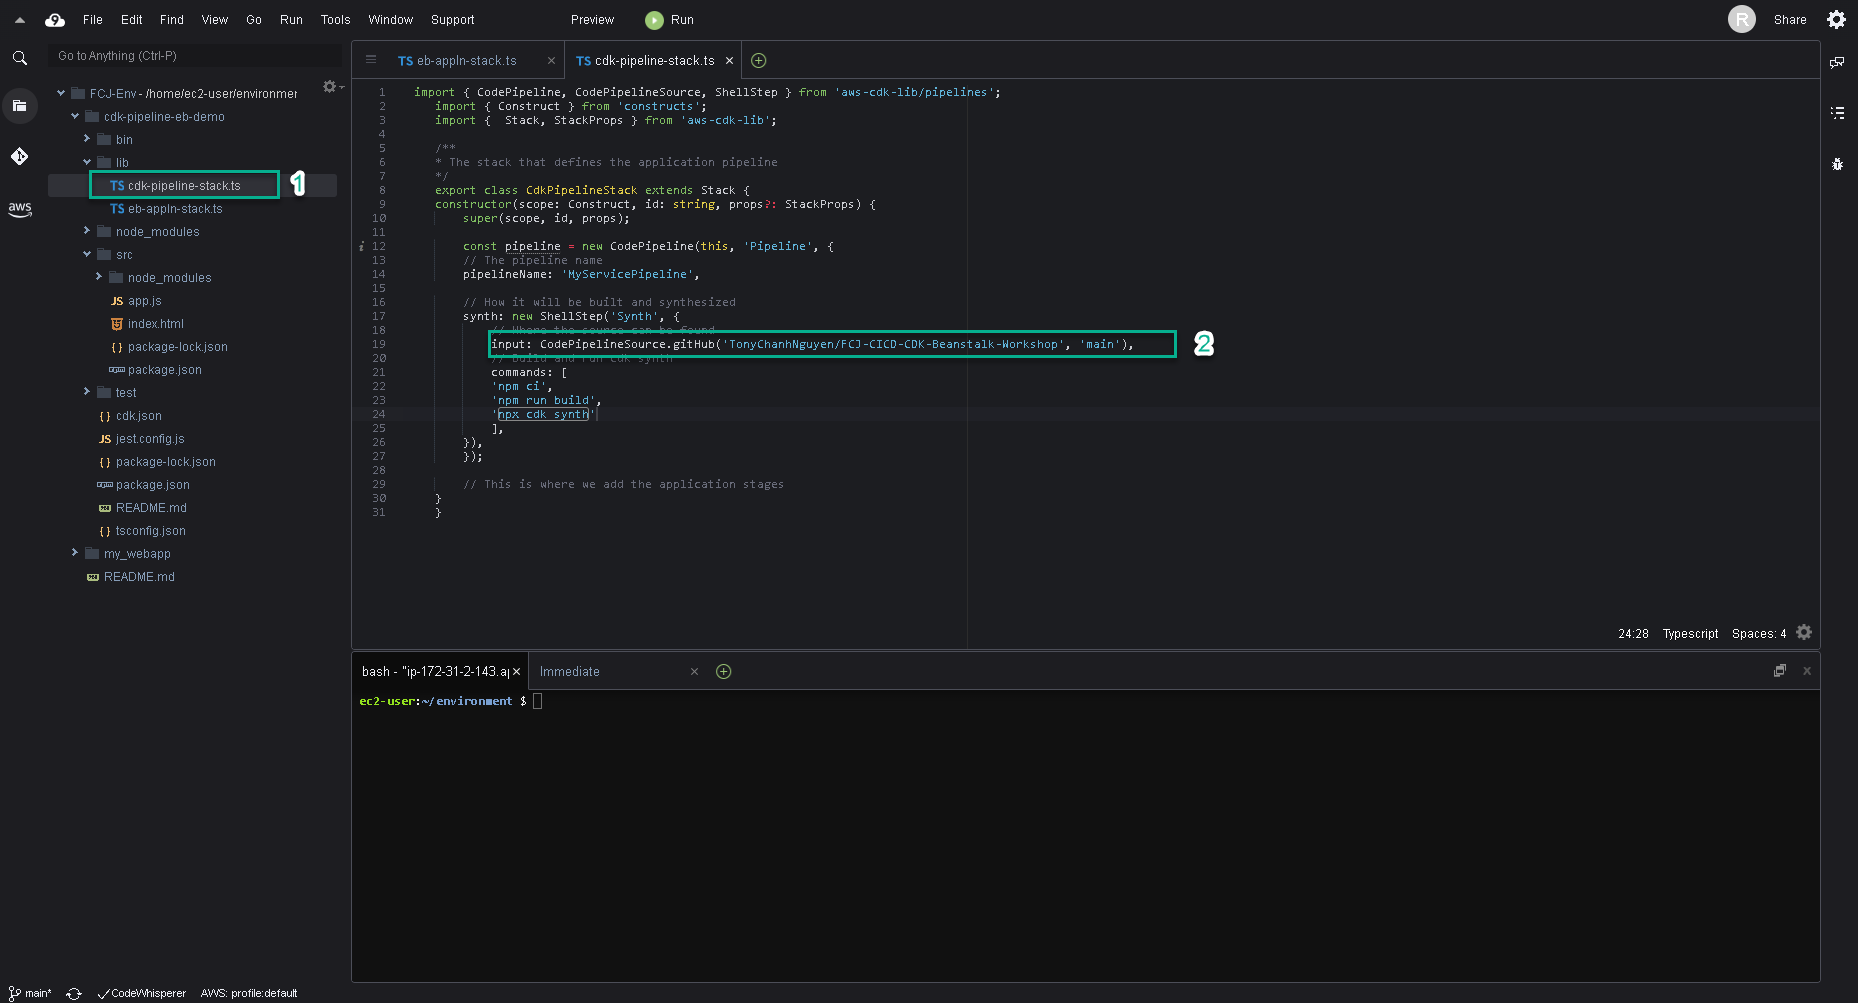
- Create new file lib/cdk-pipeline-stack.ts.
- Replace OWNER and REPO in the code below:
import { CodePipeline, CodePipelineSource, ShellStep } from 'aws-cdk-lib/pipelines';
import { Construct } from 'constructs';
import {  Stack, StackProps } from 'aws-cdk-lib';

/**
* The stack that defines the application pipeline
*/
export class CdkPipelineStack extends Stack {
constructor(scope: Construct, id: string, props?: StackProps) {
    super(scope, id, props);

    const pipeline = new CodePipeline(this, 'Pipeline', {
    // The pipeline name
    pipelineName: 'MyServicePipeline',

    // How it will be built and synthesized
    synth: new ShellStep('Synth', {
        // Where the source can be found
        input: CodePipelineSource.gitHub('OWNER/REPO', 'main'),
        // Build and run cdk synth
        commands: [
        'npm ci',
        'npm run build',
        'npx cdk synth'
        ],
    }),
    });

    // This is where we add the application stages
}
}
The code defines the following basic properties of the pipeline:
- Name for the pipeline.
- Where to find the source in GitHub. This is Source stage. Every time we push new commits to this repo, the pipeline is triggered.
- How to do the build and synthesis. For this use case, the Build stage will install a standard NPM build (this type of build runs npm run build followed by npx cdk synth).
- Put the following code in bin/cdk-pipeline-eb-demo.ts.
- Replace ACCOUNT and the REGION in there.
#!/usr/bin/env node
import 'source-map-support/register';
import * as cdk from 'aws-cdk-lib';
import { CdkPipelineStack } from '../lib/cdk-pipeline-stack';

const app = new cdk.App();

new CdkPipelineStack(app, 'CdkPipelineStack', {
env: { account: 'ACCOUNT', region: 'REGION' },
});

app.synth();

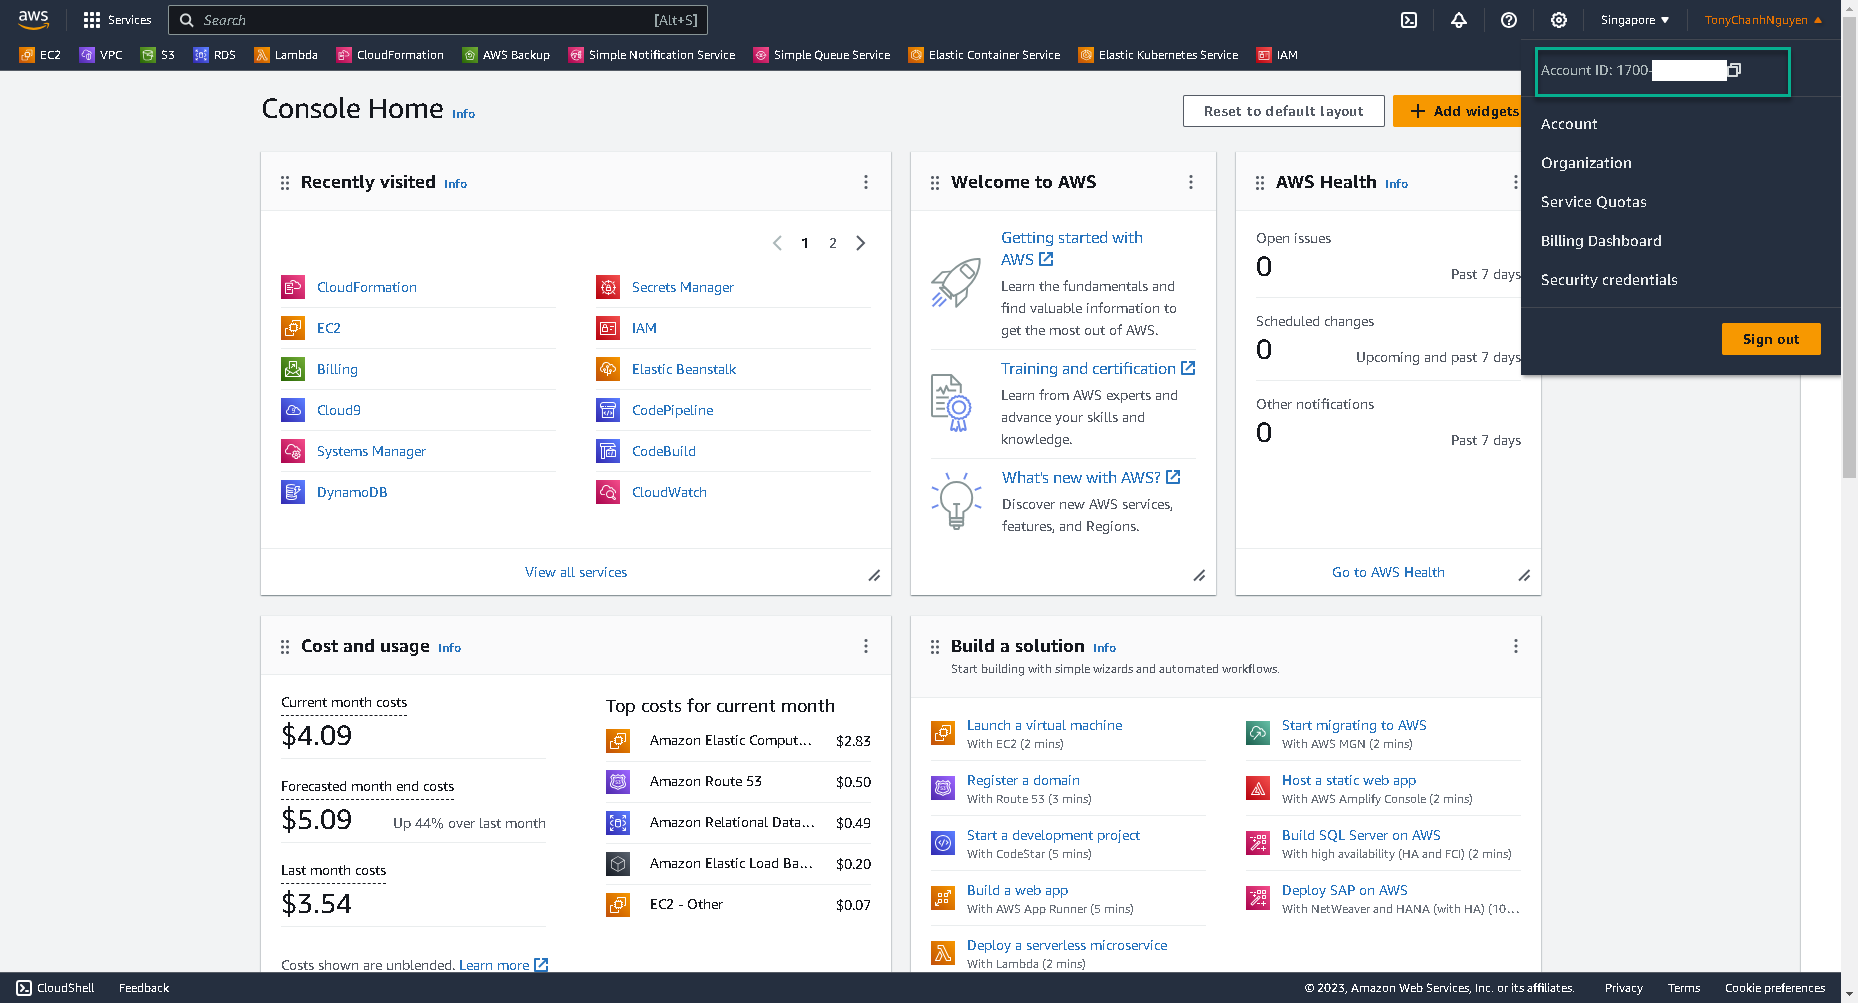
Replace ACCOUNT with your Account ID and REGION with Region ID, ex: ap-southeast-1 for region Singapore.
Copy your account ID here.
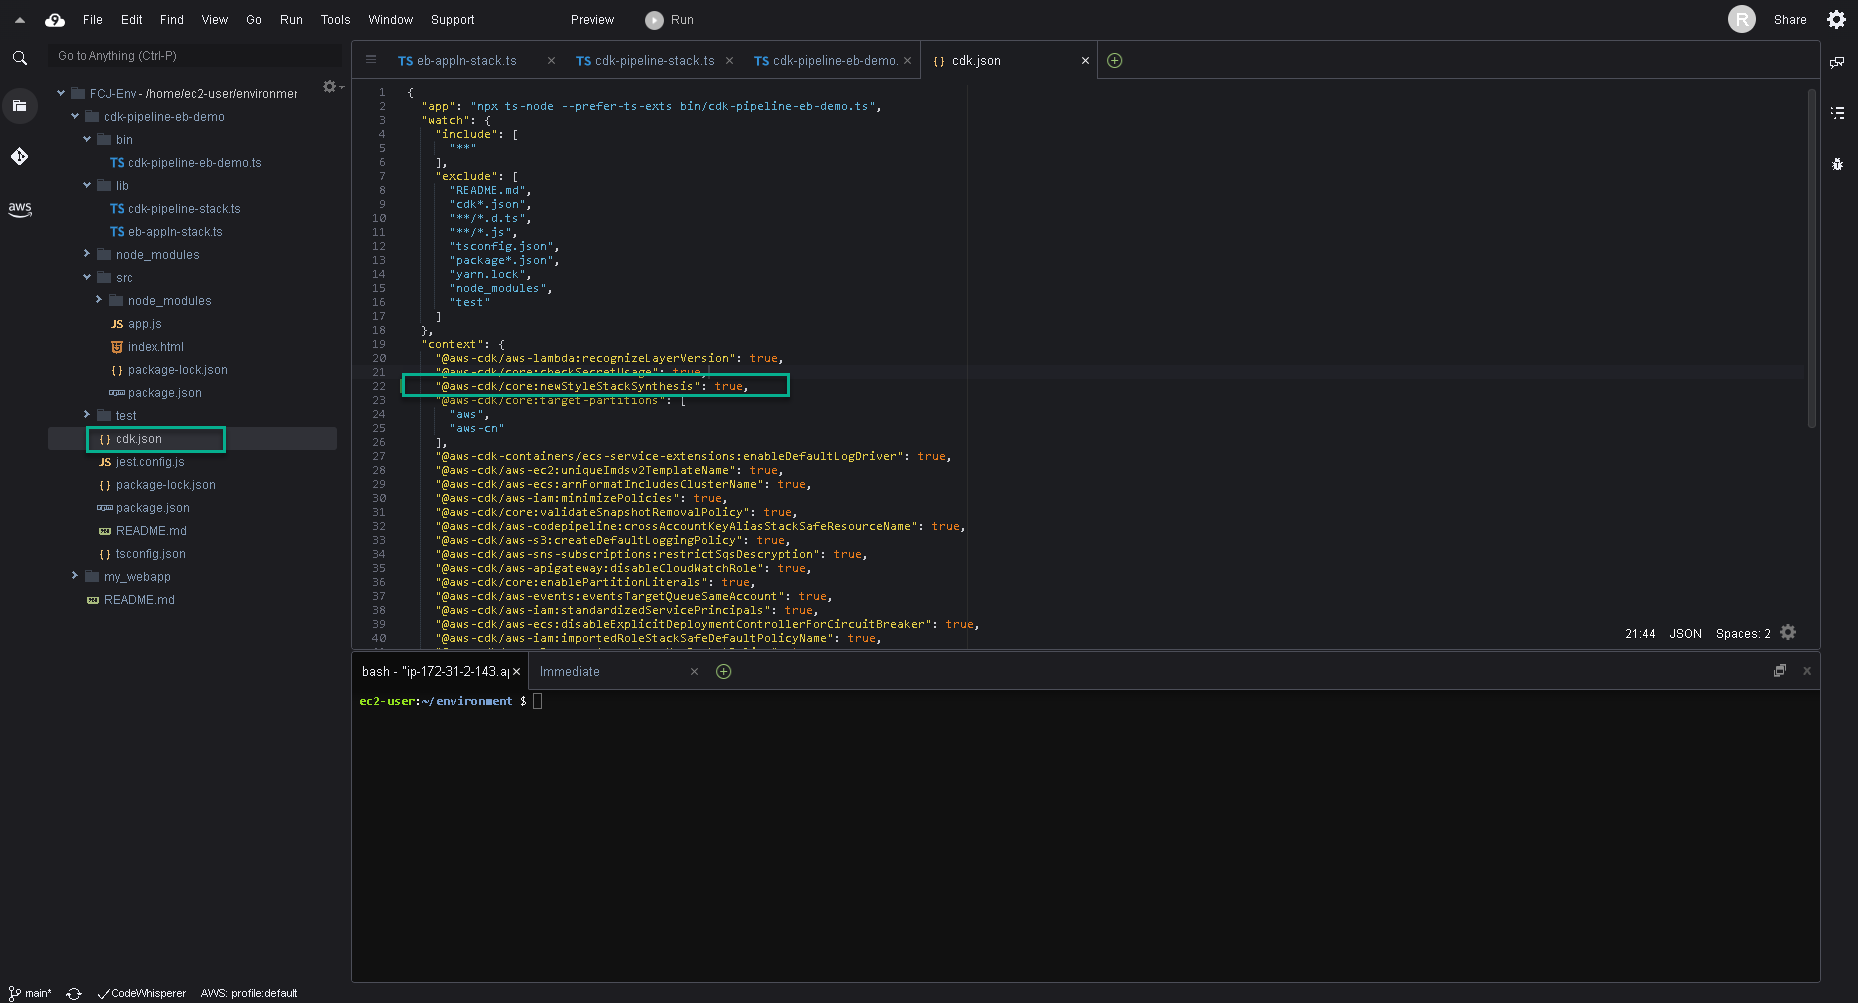
- Add the following to our cdk.json file in the “context” section, add a comma accordingly:
{
...
"context": {
    "@aws-cdk/core:newStyleStackSynthesis": true
}
}
Connect GitHub to CodePipelines
For AWS CodePipeline to read from this GitHub repo, we also need to configure the GitHub personal access token we created earlier. This token should be stored as a plaintext secret (not a JSON secret) in AWS Secrets Manager under the exact name github-token.
- Copy this command.
aws secretsmanager create-secret --name github-token --description "Github access token for cdk" --secret-string GITHUB_ACCESS_TOKEN --region REGION
- Replace GITHUB_ACCESS_TOKEN with your plaintext secret had been created at 2.1 Create GitHub repository.
- Replace REGION with your Region ID, ex:
ap-southeast-1. - Paste and run it at terminal of your Cloud9 environment.
