Check result
Verify the result
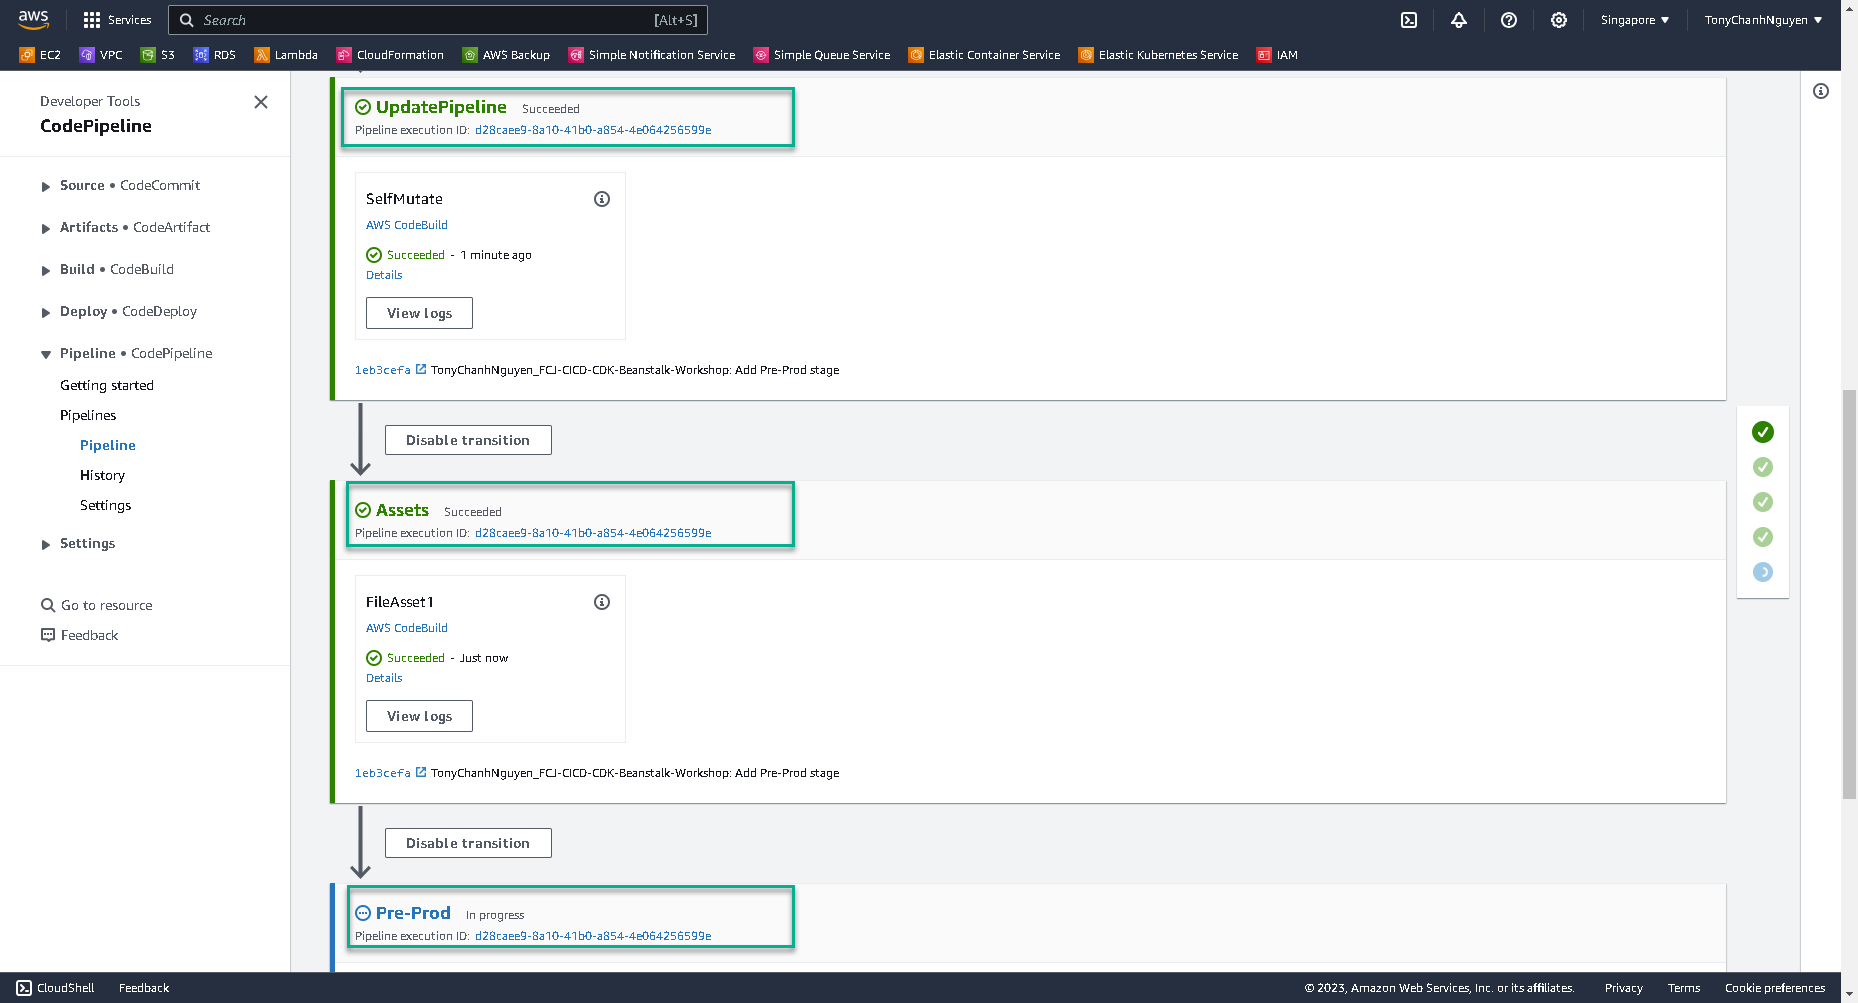
In CodePipeline console, once the UpdatePipeline stage picks up new code for an additional stage, it will self-mutate and add 2 new stages, one for the Assets and another for Pre-Prod. Once the UpdatePipeline stage has completed successfully, the pipeline will again run from start. This time it will not stop at UpdatePipeline stage. It will transition further to the new stages Assets and Pre-prod to deploy the Beanstalk application, environment and the MyWebApp application.
- Go to CodePipeline. The new stages Assets and Pre-prod will be added when UpdatePipeline stage is built successfully.
-
After all of stages in CodePipeline were built, two CloudFormation stacks are created.
- The first stack name Pre-Prod-WebService to create Elastic Beanstalk Application and Environment.
- The second stack name awseb-e-xxxxxxxxxx-stack to create Auto Scaling Group and Load Balancer for Elastic Beanstalk Environment. Go to Auto Scaling Group and Load Balancer to verify that.
-
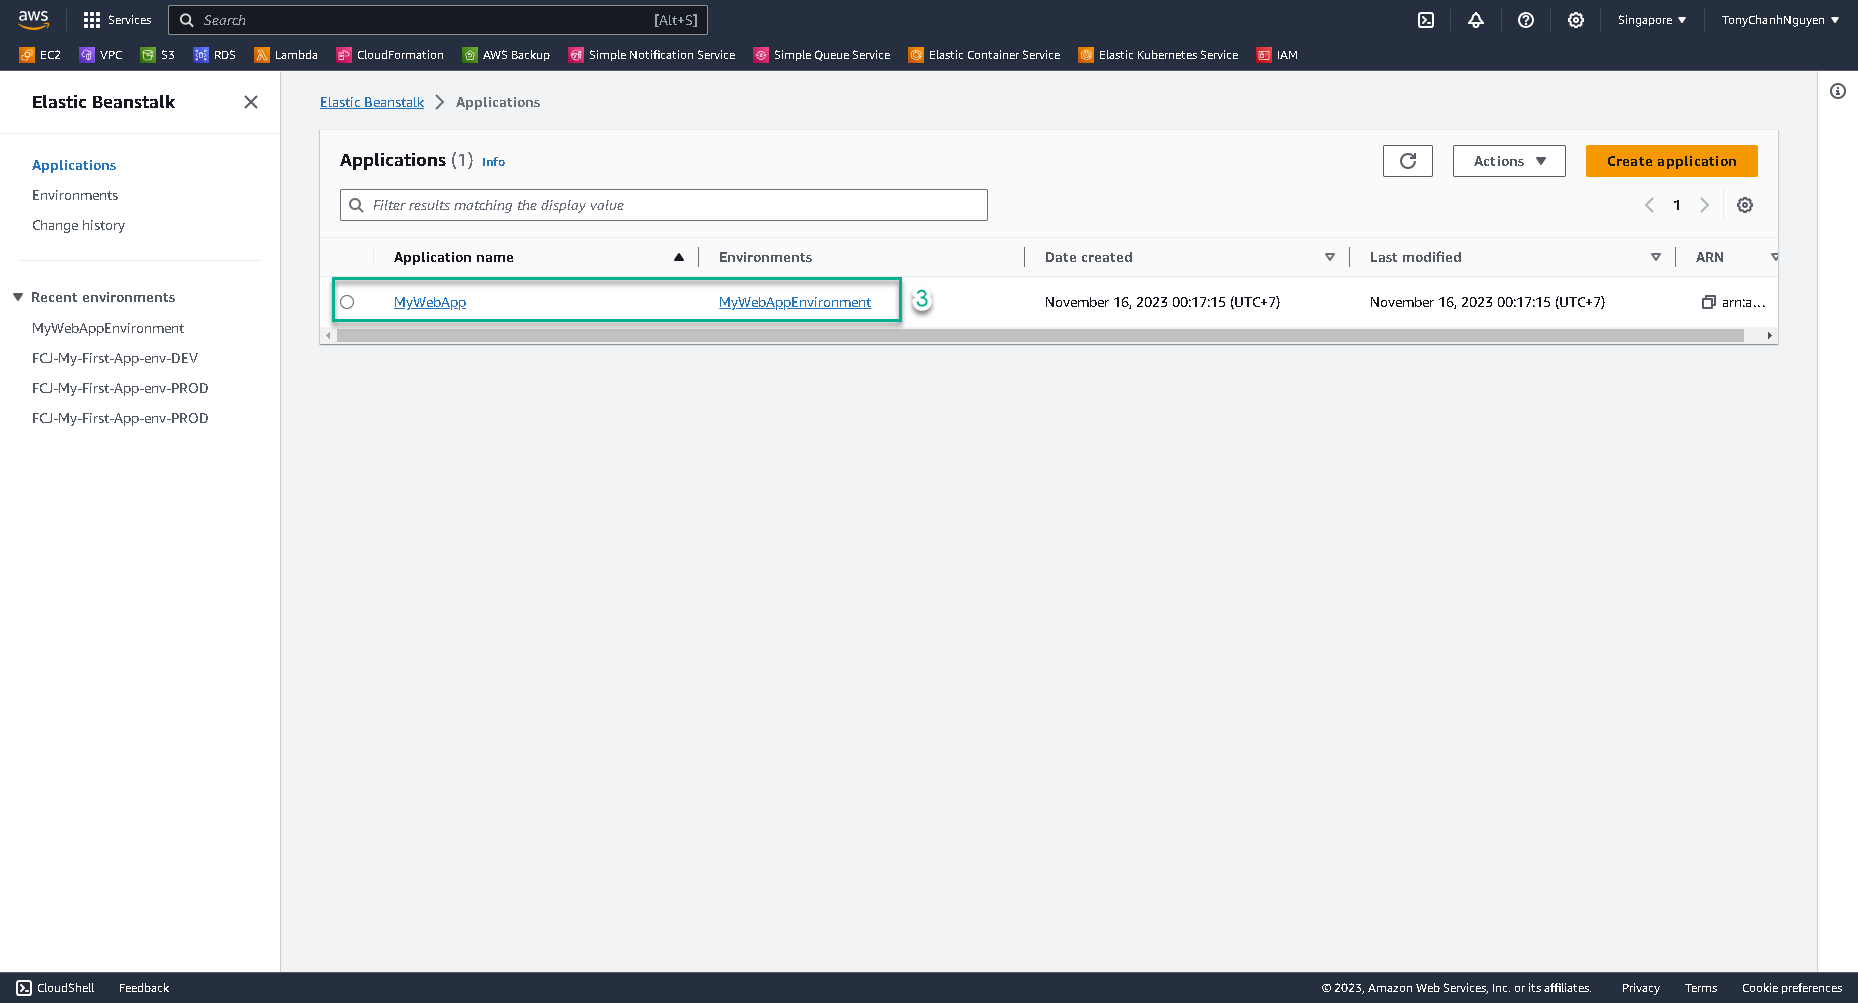
Go to Elastic Beanstalk to verify the result.
-
Click to application name MyWebApp.
-
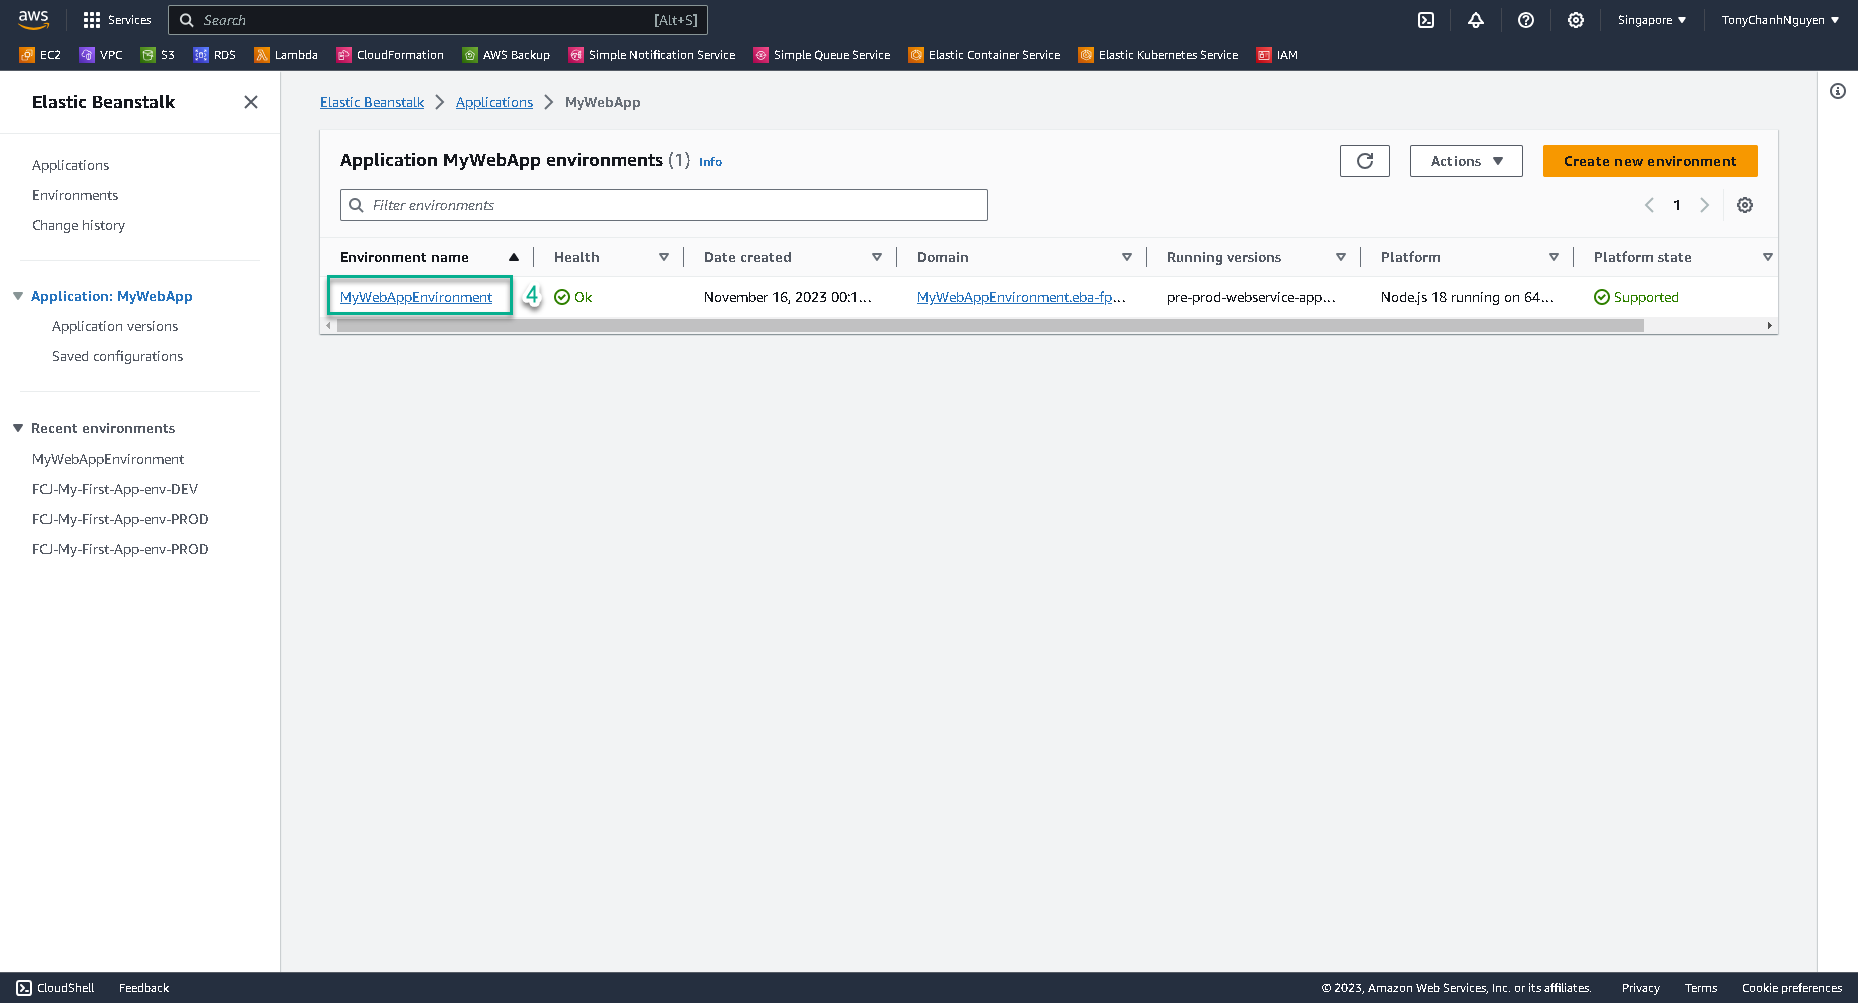
Click MyWebAppEnvironment environment.
-
Click Domain of environment to see the result of your application.
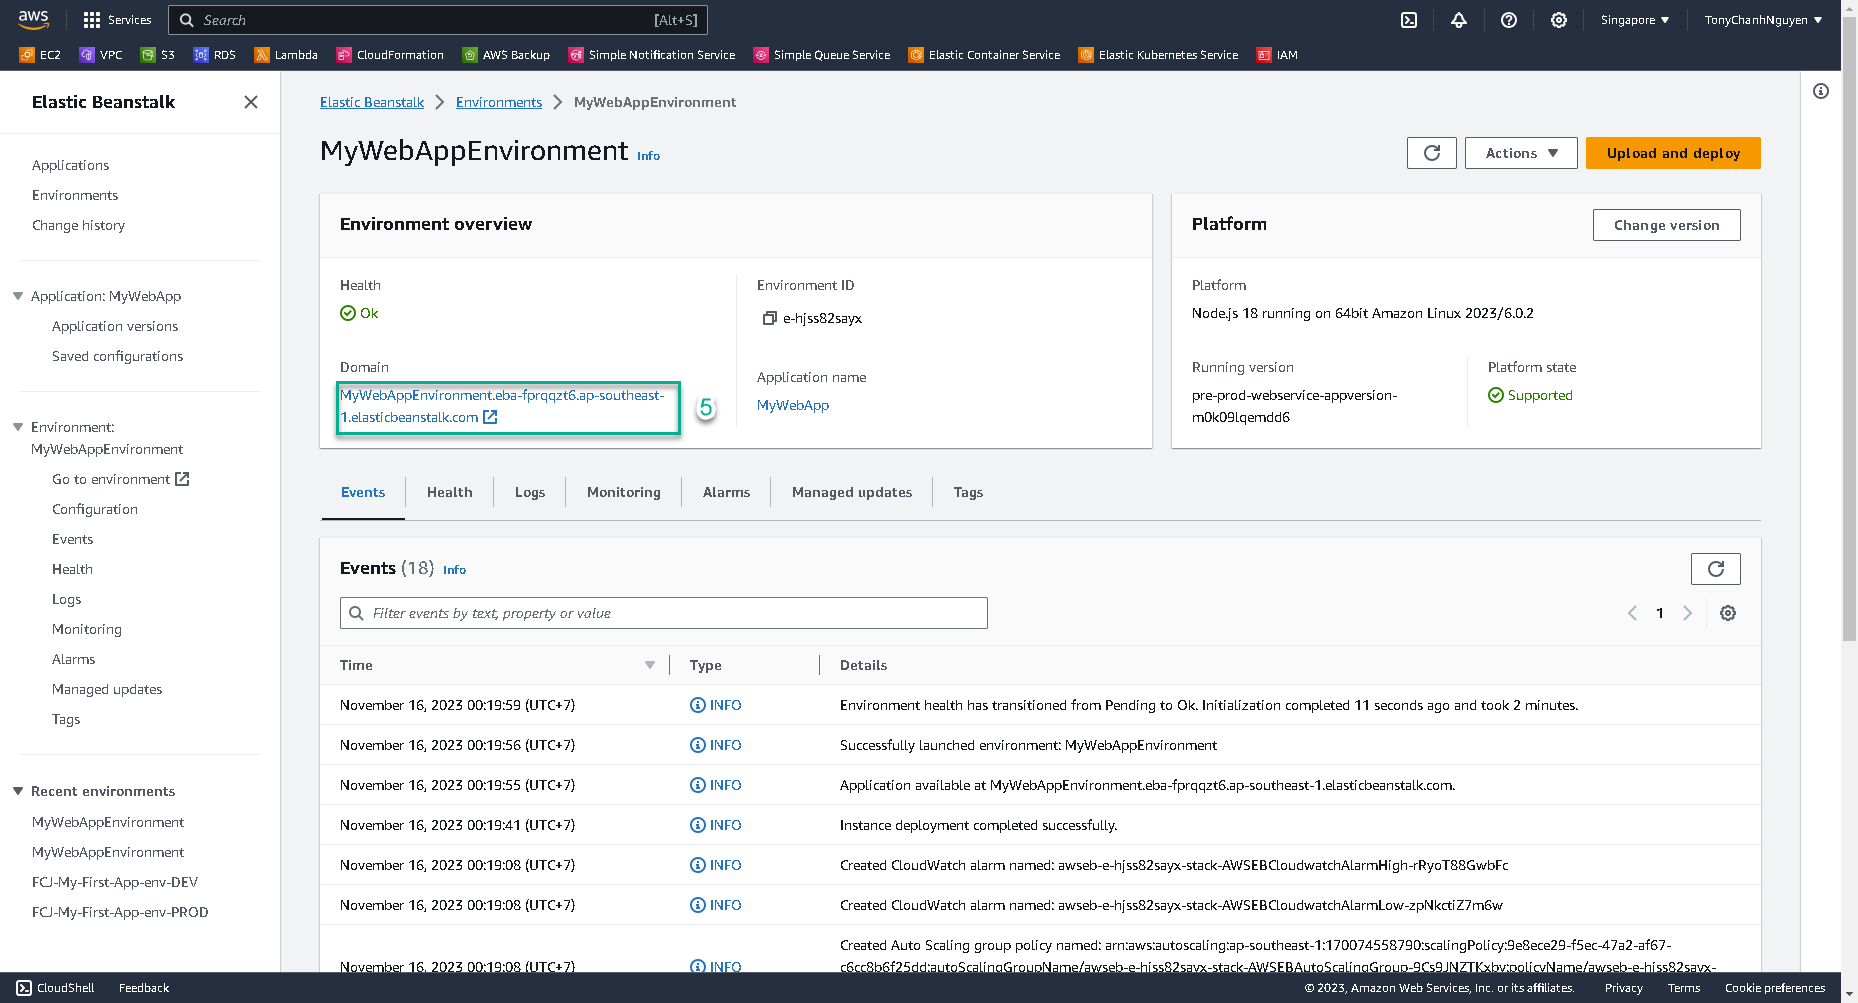

Congratulation, your CDK Pipeline was created successfully.
Update the Node.js Application Deployment
-
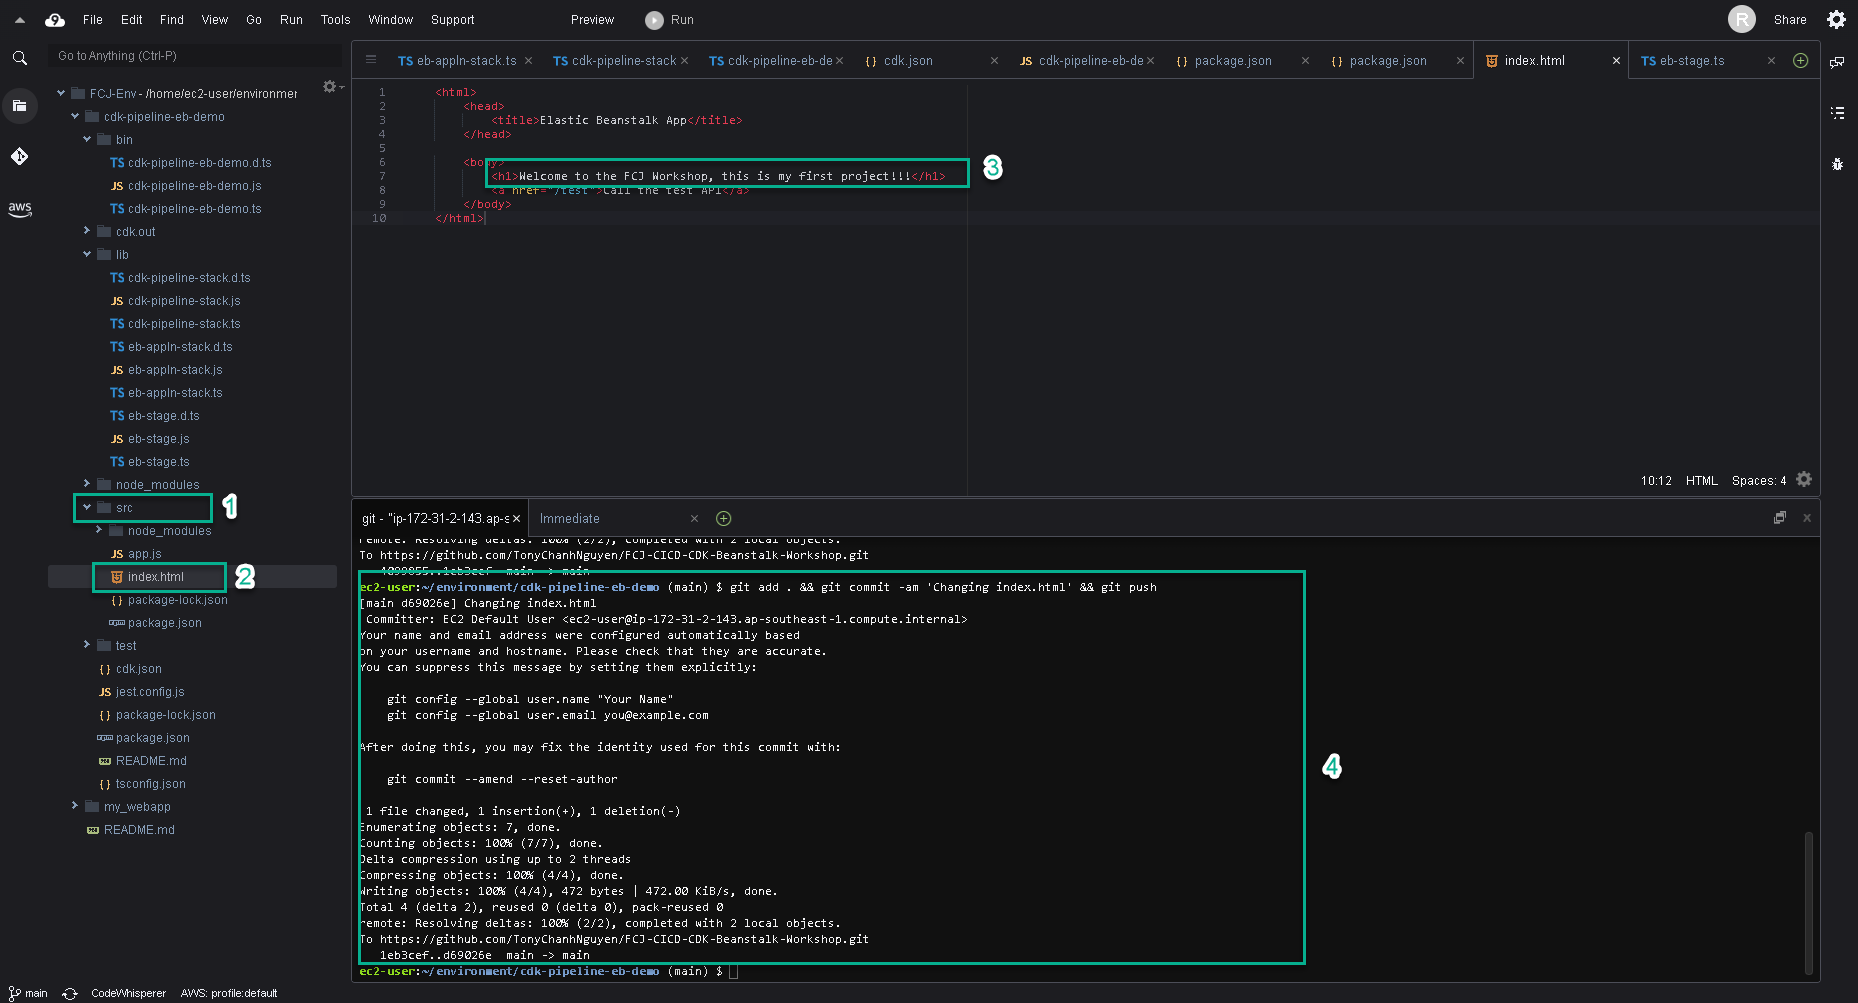
At ./src/index.html, make the changes you want and save. Ex: Replace Welcome to the FCJ Workshop to
Welcome to the FCJ Workshop, this is my first project!!!. -
Push your source code to GitHub repository.
git add . && git commit -am 'Changing index.html' && git push
- Go to CodePipeline, you will see the commit id with source code which you took the changes, is built.
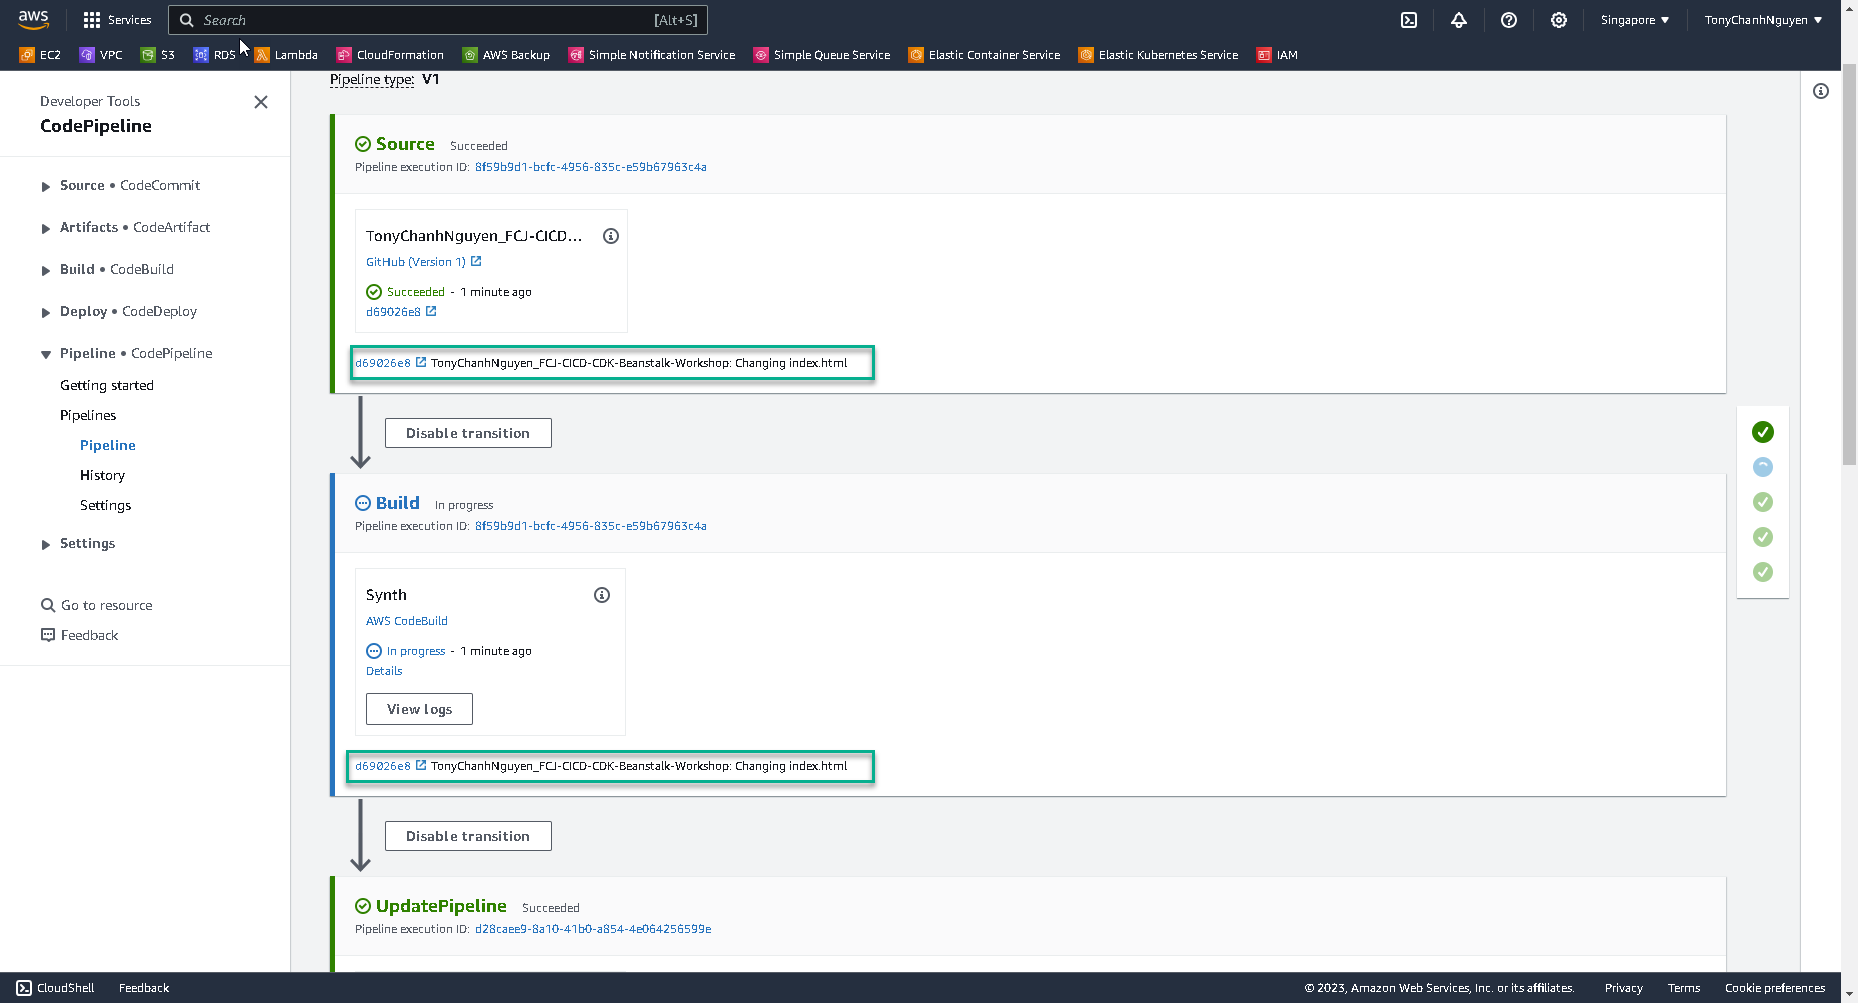
- When all stages are done, reload the domain of Elastic Beanstalk Environment to see the result.
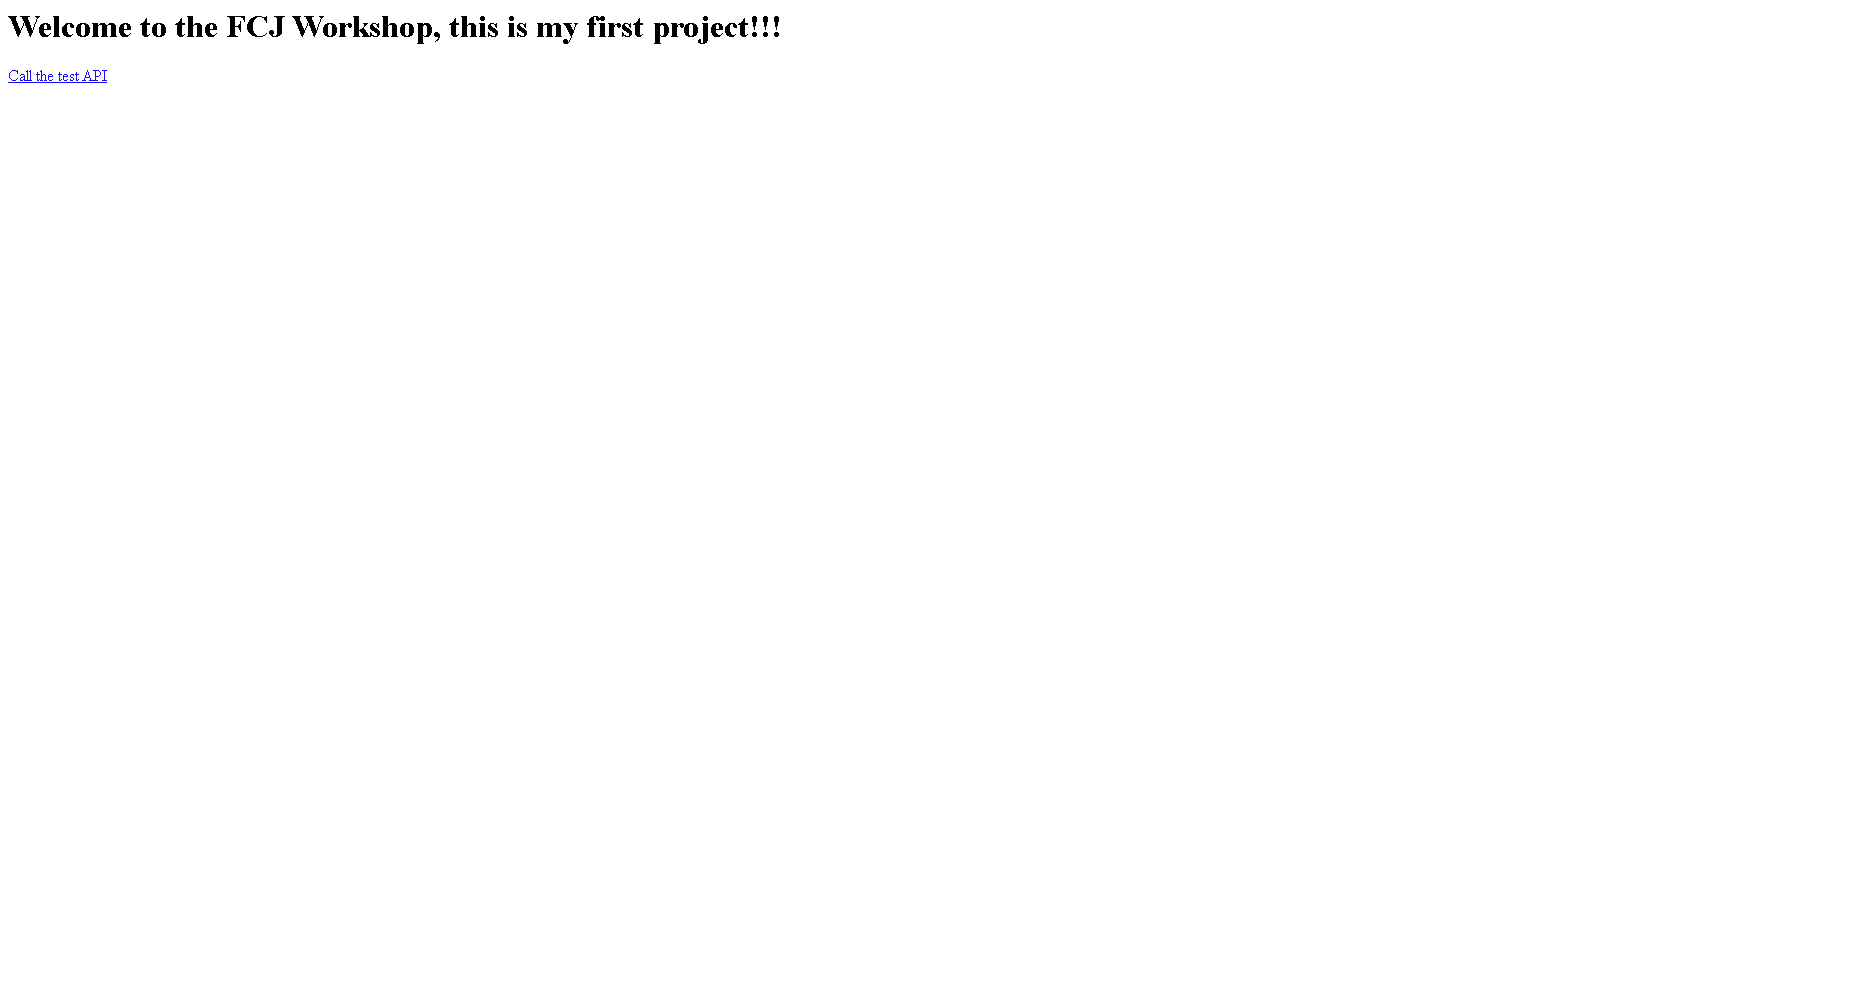
Congratulation, your CDK Pipeline deployed your changing application.