Tạo CICD Pipeline Stack
Xác định một đường ống rỗng
Ở bước này, chúng ta chỉ đang tạo các giai đoạn này - Source, Build và UpdatePipelineand thì thế nó là một đường ống rỗng. Trong phần tiếp theo, chúng ta sẽ thêm các giai đoạn (PublishAssets, Stage1) và hành động phù hợp với nhu cầu của ứng dụng.
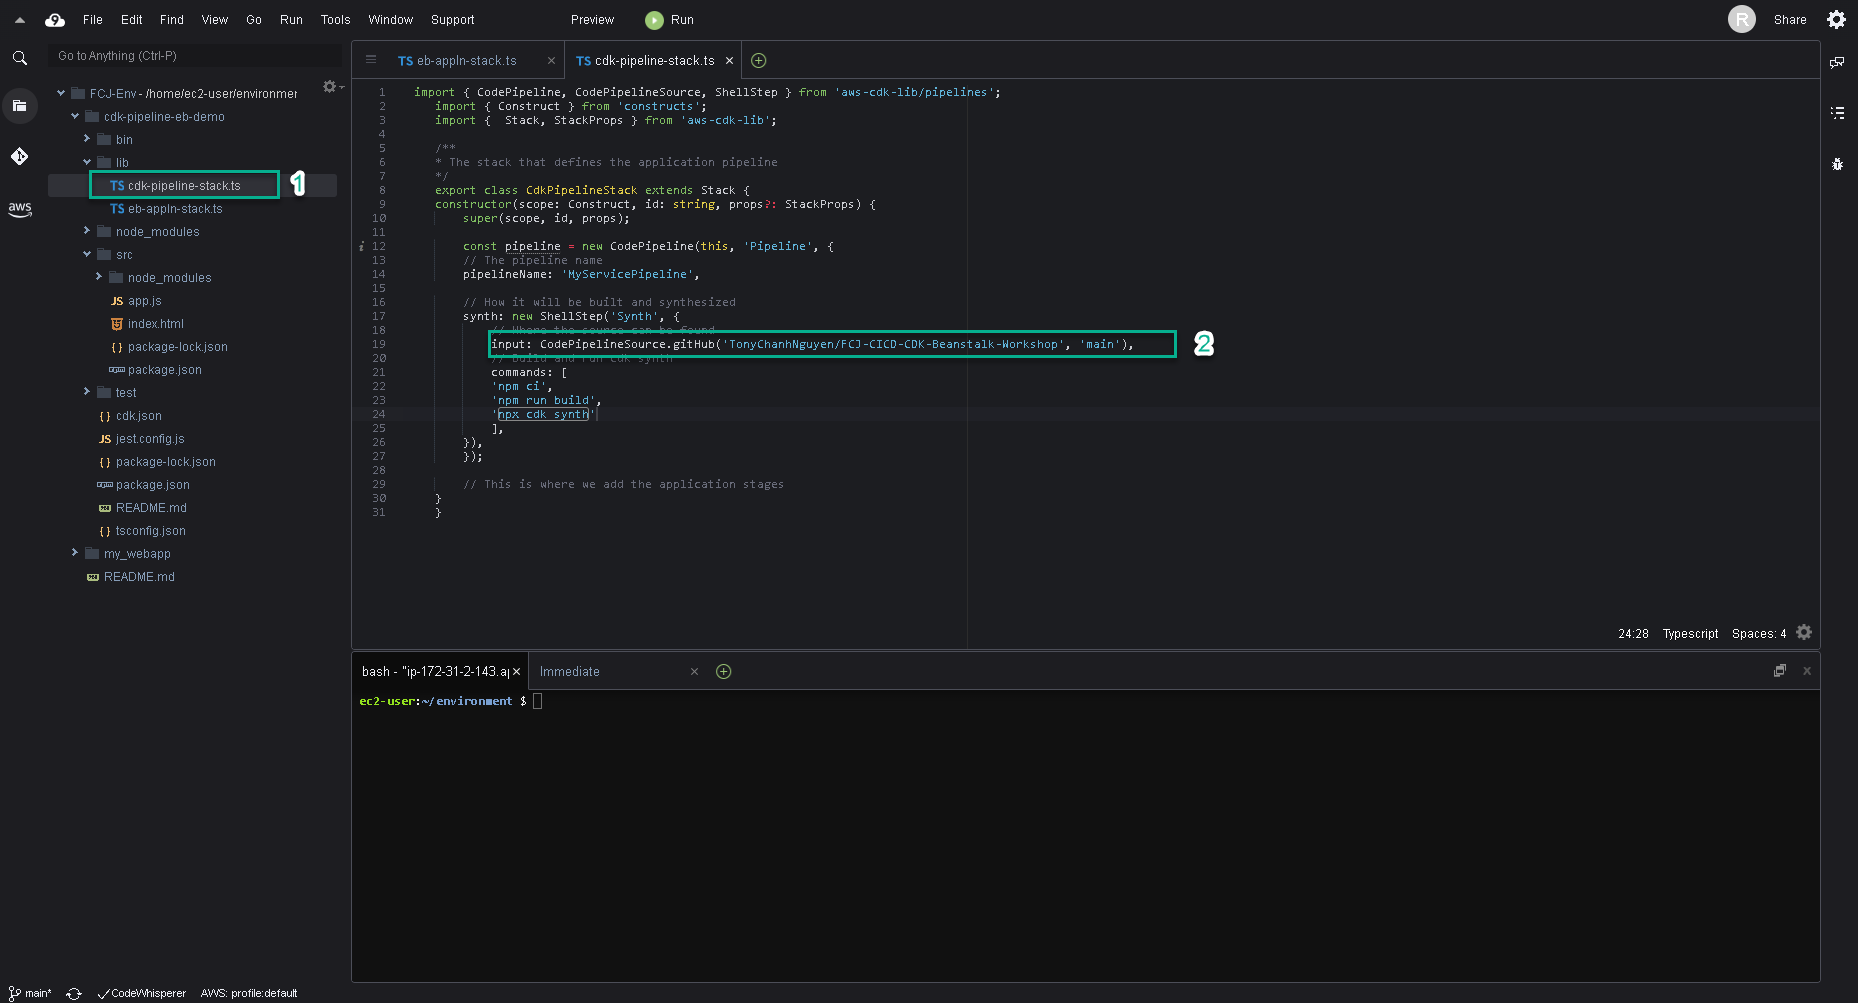
- Tạo tệp mới lib/cdk-pipeline-stack.ts.
- Thay thế OWNER và REPO ở đoạn code bên dưới:
import { CodePipeline, CodePipelineSource, ShellStep } from 'aws-cdk-lib/pipelines';
import { Construct } from 'constructs';
import {  Stack, StackProps } from 'aws-cdk-lib';

/**
* The stack that defines the application pipeline
*/
export class CdkPipelineStack extends Stack {
constructor(scope: Construct, id: string, props?: StackProps) {
    super(scope, id, props);

    const pipeline = new CodePipeline(this, 'Pipeline', {
    // The pipeline name
    pipelineName: 'MyServicePipeline',

    // How it will be built and synthesized
    synth: new ShellStep('Synth', {
        // Where the source can be found
        input: CodePipelineSource.gitHub('OWNER/REPO', 'main'),
        // Build and run cdk synth
        commands: [
        'npm ci',
        'npm run build',
        'npx cdk synth'
        ],
    }),
    });

    // This is where we add the application stages
}
}
Code xác định các thuộc tính cơ bản của đường ống như sau:
- Tên của đường ống.
- Nơi để tìm nguồn trong GitHub. Đây là giai đoạn Source. Mỗi lần chúng ta đẩy commit mới lên repo, đường ống sẽ được kích hoạt.
- Cách thực hiện việc xây dựng và tổng hợp. Trong trường hợp này, giai đoạn Build sẽ tải một kiến trúc NPM (kiểu xây dựng này chạy npm run build theo sau là npx cdk synth).
- Dán đoạn code dưới đây vào file bin/cdk-pipeline-eb-demo.ts.
- Thay thế ACCOUNT và REGION.
#!/usr/bin/env node
import 'source-map-support/register';
import * as cdk from 'aws-cdk-lib';
import { CdkPipelineStack } from '../lib/cdk-pipeline-stack';

const app = new cdk.App();

new CdkPipelineStack(app, 'CdkPipelineStack', {
env: { account: 'ACCOUNT', region: 'REGION' },
});

app.synth();

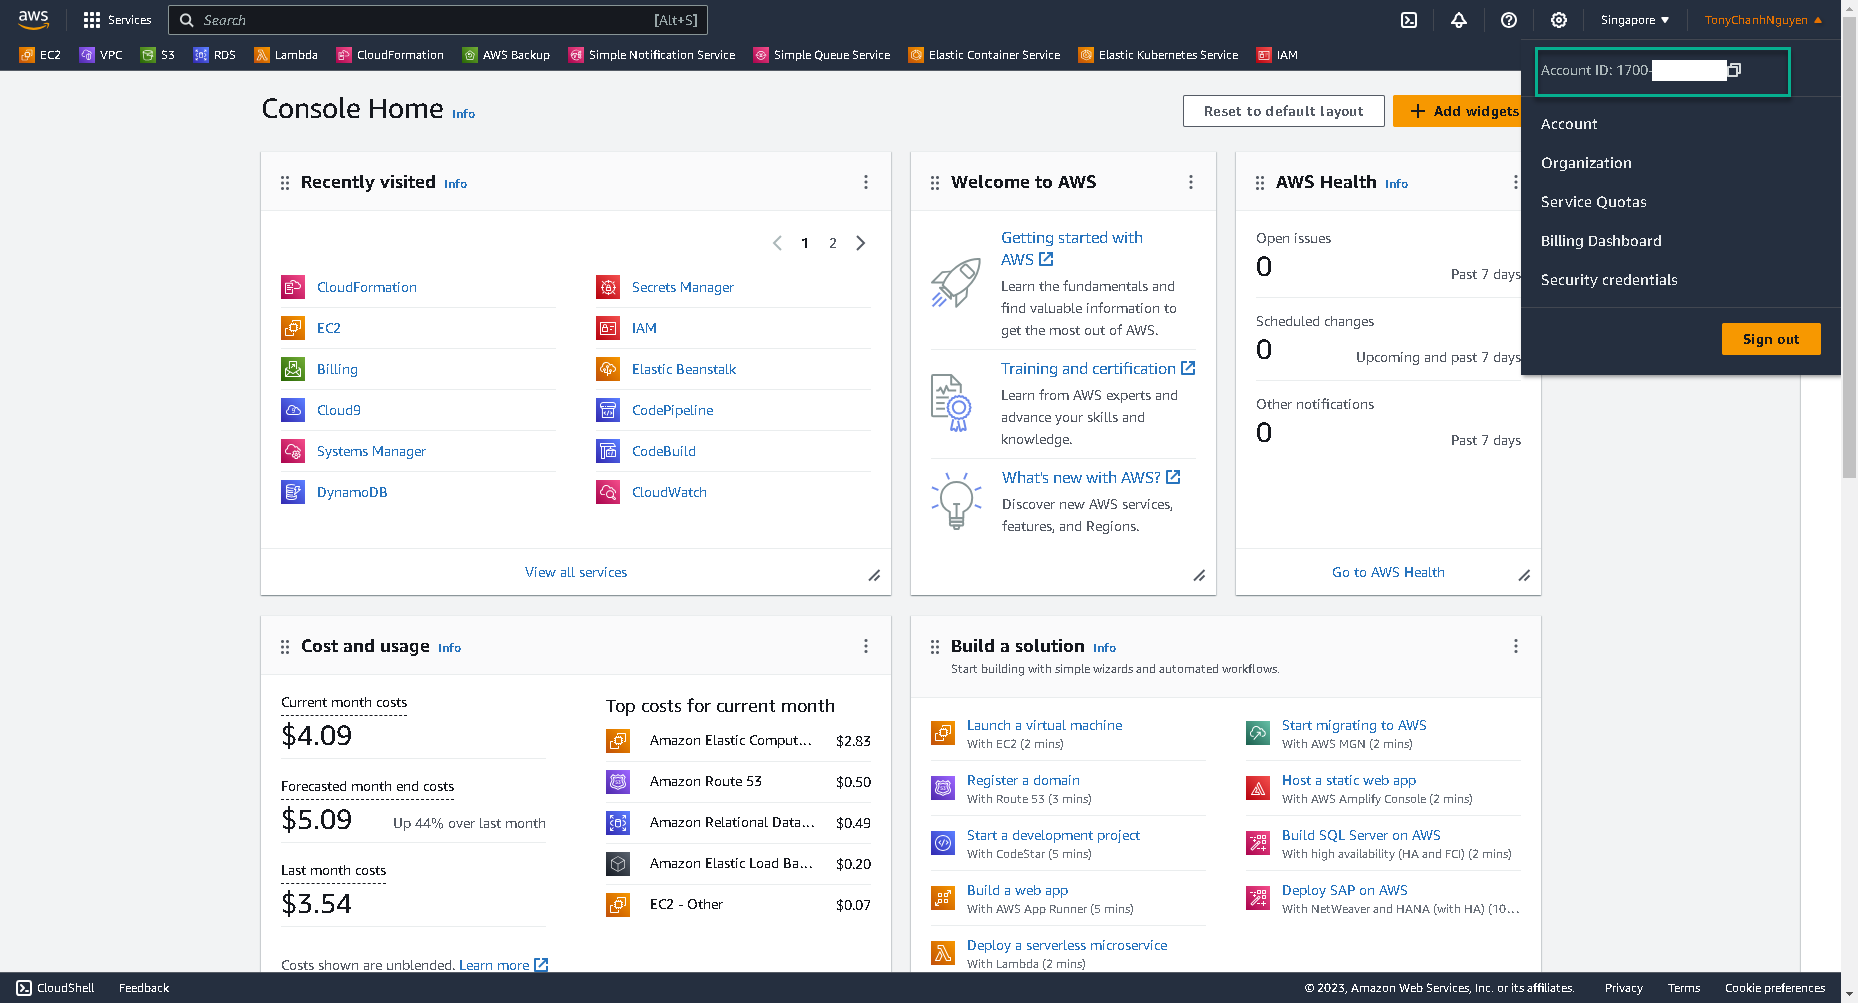
Thay thế ACCOUNT với Account ID của bạn và REGION với Region ID, Ví dụ: ap-southeast-1 cho vùng Singapore.
Sao chép account ID của bạn tại đây.
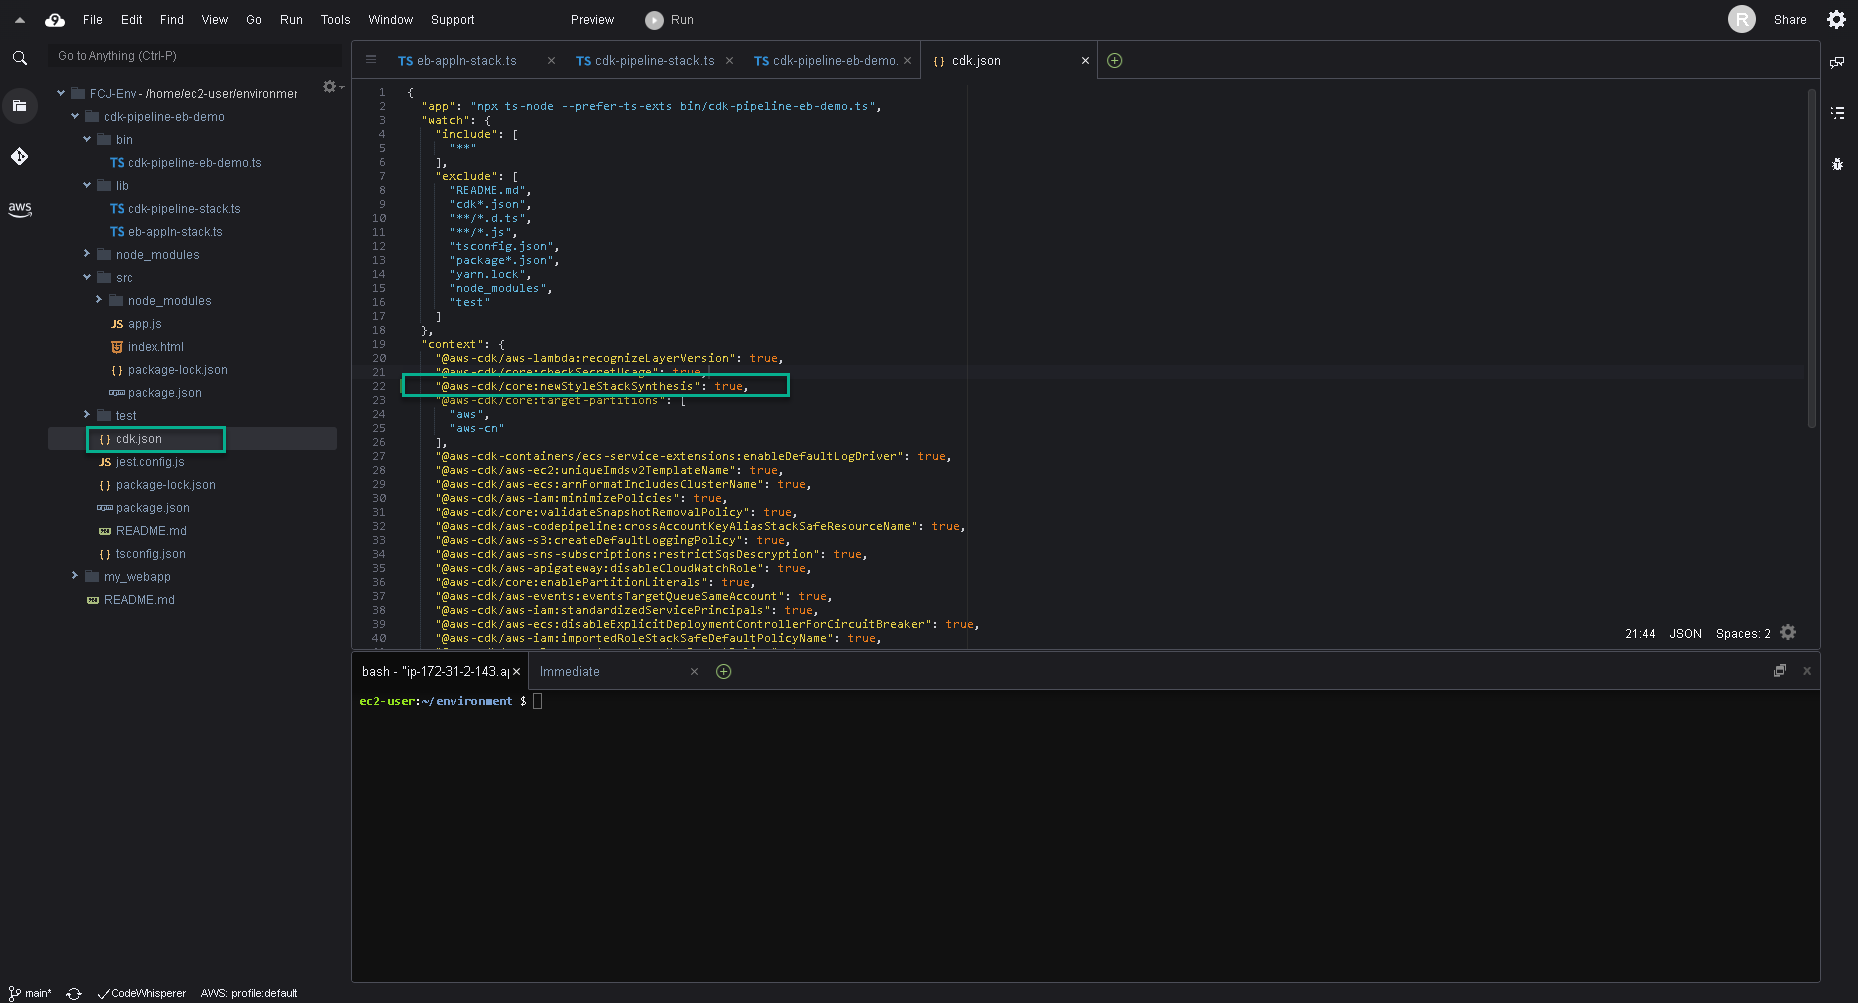
- Thêm đoạn bên dưới vào tệp cdk.json trong phần “context”:
{
...
"context": {
    "@aws-cdk/core:newStyleStackSynthesis": true
}
}
Kết nối GitHub đến CodePipelines
For AWS CodePipeline to read from this GitHub repo, we also need to configure the GitHub personal access token we created earlier. This token should be stored as a plaintext secret (not a JSON secret) in AWS Secrets Manager under the exact name github-token. Để AWS CodePipeline đọc từ kho lưu trữ GitHub này, chúng ta cũng cần định cấu hình access token cá nhân GitHub mà chúng ta đã tạo trước đó. Token này phải được lưu trữ dưới dạng bí mật văn bản gốc (không phải bí mật JSON) trong AWS Secrets Manager dưới tên chính xác là github-token.
- Sao chép đoạn mã này.
aws secretsmanager create-secret --name github-token --description "Github access token for cdk" --secret-string GITHUB_ACCESS_TOKEN --region REGION
- Thay thế GITHUB_ACCESS_TOKEN với access token được tạo tại 2.1 Create GitHub repository.
- Thay thế REGION với Region ID của bạn, Ví dụ:
ap-southeast-1. - Dán và chạy tại terminal của Cloud9.
